Category: Automotive

Polaris RZR 800 vs Can Am Maverick Sport

polaris light

When it comes to recreational off-roading, the competition between side-by-side vehicles has never been fiercer. Two standout models in this competitive landscape are the Polaris RZR 800 and the Can-Am Maverick Sport. Both are built to conquer trails, hills, and mud with confidence—but how do they stack up when compared directly? From performance and handling to comfort, lighting, and customization options, here’s a detailed breakdown to help you decide which machine suits your style and terrain demands best.

Power and Performance

The Polaris RZR 800 is known for its reliable 760cc engine, delivering around 52 horsepower. It shines in tight trails and wooded terrain, offering exceptional maneuverability and a lightweight build that makes it agile in narrow passes. The automatic PVT transmission with true on-demand AWD makes the RZR 800 intuitive to drive and quick to react to changing terrain.

On the other hand, the Can-Am Maverick Sport comes equipped with a more powerful 976cc Rotax V-Twin engine, producing up to 75 horsepower. That boost in power makes it ideal for riders who want speed and strong acceleration across open terrain. With its advanced suspension and longer wheelbase, the Maverick Sport feels more planted on fast runs and absorbs bumps with ease.

Ride Comfort and Suspension

Both machines offer comfortable rides, but the Can-Am Maverick Sport edges ahead with its premium FOX 2.0 Podium shocks and longer suspension travel. The RZR 800’s dual A-arm suspension handles most terrain well but can feel stiffer on high-speed sections or over aggressive obstacles.

Cabin design also plays a role in comfort. While the RZR 800 offers a more minimalist setup that appeals to purists, the Maverick Sport delivers a more spacious and refined cockpit with improved ergonomics and better passenger accommodations.

Lighting System: See and Be Seen

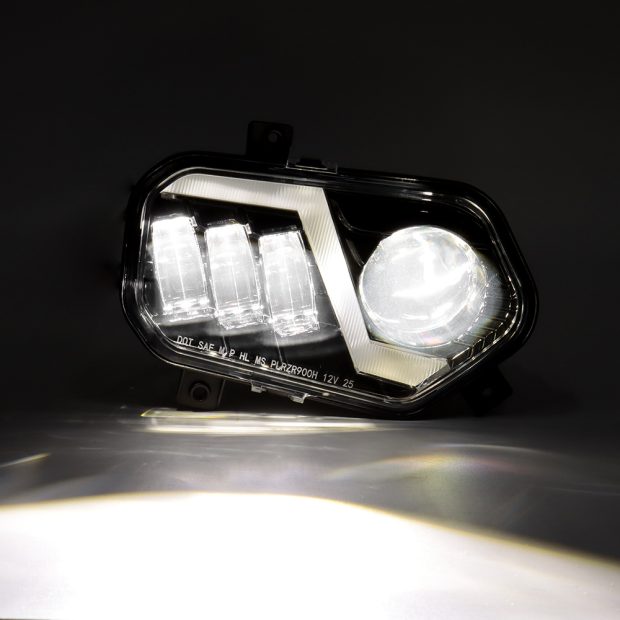
Lighting is a crucial factor for night rides and visibility in low-light conditions. The Polaris RZR 800 typically comes with standard halogen headlights, which provide adequate illumination for casual night riding. However, many owners upgrade to aftermarket Polaris RZR LED headlights and light bars to enhance brightness, beam distance, and style. The RZR’s aftermarket support in lighting accessories is massive, making it easy to find plug-and-play kits with high-lumen output and waterproof construction.

The Can-Am Maverick Sport, by contrast, is often outfitted with LED headlights straight from the factory. These LEDs offer better clarity and energy efficiency compared to halogens. The Maverick’s integrated lighting system also includes stylish DRLs (Daytime Running Lights) that enhance both visibility and design. If superior lighting out of the box is a priority, the Maverick Sport holds the advantage. However, the RZR 800’s strong aftermarket scene gives it room for personalized lighting upgrades tailored to your preferences.

Customization and Accessories

The Polaris RZR 800 is beloved for its versatility and vast range of available upgrades—from audio systems and roof racks to bumpers, winches, and LED whip lights. Its simpler frame and mechanical design make it easier for DIY installations and maintenance. With years of models in circulation, parts and mods are widely available and affordable.

Meanwhile, the Can-Am Maverick Sport supports a range of BRP-exclusive accessories and third-party options, but customization often comes at a higher cost. However, the refined build and modern design of the Maverick lend themselves well to premium accessories and integrated tech features, like touchscreen displays and ride command systems.

Choosing between the Polaris RZR 800 and the Can-Am Maverick Sport depends on what you value most in a side-by-side. The RZR 800 is a rugged, budget-friendly machine perfect for tight trail rides, casual adventures, and customizable fun. The Maverick Sport offers more power, comfort, and factory features for riders who want a more aggressive and refined experience. Whether you’re drawn to the legacy of Polaris or the innovation of Can-Am, both vehicles are trail-tested champions ready to elevate your off-road adventures. Pair your choice with the right lighting, suspension, and audio upgrades, and you’re guaranteed a ride you’ll never forget.

1995 Toyota Hilux Lighting Upgrade to Boost Visibility for Off-Road Driving

Hilux

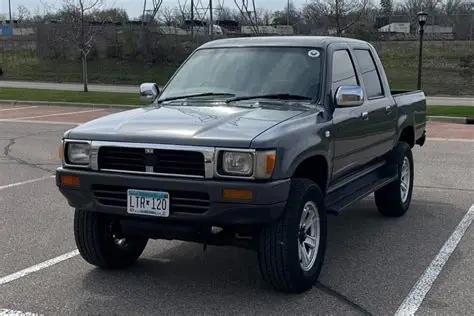
The 1995 Toyota Hilux is a legendary off-road and work truck, but its stock halogen lighting is outdated by today’s standards. Weak, yellow-tinted headlights make night driving and off-roading hazardous. Fortunately, modern lighting upgrades can transform your Hilux’s visibility without breaking the bank.

This guide covers the best lighting upgrades for the 1995 Hilux, including 1995 Toyota Hilux LED headlight conversions, auxiliary light setups, and wiring improvements—ensuring you see (and are seen) clearly in all conditions.


Why Upgrade a 1995 Hilux’s Lighting?

The factory H4 halogen bulbs (used in most 1995 Hilux models) suffer from:

  • Dim output (~1,000 lumens)—barely adequate for rural roads.
  • Short lifespan—halogen bulbs burn out quickly.
  • Poor beam focus—light scatters, reducing visibility.

Upgrading provides:
✅ Brighter illumination (3x-5x more light).
✅ Longer-lasting bulbs (LEDs last 50,000+ hours).
✅ Better beam control (sharper cutoff for less glare).
✅ Modern white light (improves contrast in rain/fog).


Best Lighting Upgrades for the 1995 Hilux

1. LED H4 Headlight Bulbs (Plug-and-Play)

Best for: Quick, budget-friendly brightness boost.

  • Benefits:
    • 3,000+ lumens (vs. 1,000 lumens stock).
    • 6,000K white light (vs. 3,200K yellow halogens).
  • Top Picks:
    • AUXITO H4 LED (fanless, no flickering).
    • Philips Ultinon H4 (DOT-approved).

Installation:

  1. Remove the old H4 bulb.
  2. Plug in the LED (ensure proper orientation).
  3. Secure the driver box (if applicable).

2. Sealed Beam to H4 Conversion (For Older Models)

Some 1995 Hilux models use sealed beam headlights, which are even worse than H4 halogens.

Solution:

  • Replace sealed beams with H4 housings (allows LED/HID upgrades).
  • Recommended Kit: Cibie H4 Conversion Headlights (glass lens, better beam focus).

3. Auxiliary Lighting (For Off-Road & Work Use)

If you drive off-road or need extra visibility, consider:

A. LED Light Bars

  • 20-inch Single Row (spot beam for distance).
  • 32-inch Double Row (flood beam for wide coverage).
  • Mounting: Bull bar or roof rack.

B. LED Fog Lights (H3 or H11 Bulbs)

  • Amber lenses (better in fog/dust).
  • Mounting: Bumper or grille guard.

C. Reverse Lights (For Night Backing-Up)

  • 18W LED pods (dramatically improves rear visibility).

4. Wiring & Electrical Upgrades

Older Hilux wiring can’t always handle modern LEDs. Key fixes:

A. Relay Harness Upgrade

  • Prevents voltage drop (brighter lights).
  • Recommended: H4 Heavy-Duty Wiring Harness.

B. Waterproof Connectors

  • Protects auxiliary lights from mud/water.

C. High-Output Alternator (If Running Multiple Lights)

  • Stock alternator (~70A) may struggle—upgrade to 100A+.

5. Legal Considerations

  • Headlights: Must be DOT/ECE-approved for road use.
  • Light Bars: Off-road only (illegal on highways).
  • Fog Lights: Must be aimed low (below headlight level).

6. Step-by-Step Installation

LED Headlight Upgrade

  1. Disconnect the battery.
  2. Remove the headlight housing (usually 2-3 screws).
  3. Unplug the old bulb and install the LED.
  4. Secure the driver box (if needed).
  5. Test before reassembling.

Light Bar Installation

  1. Mount the light bar (bumper/roof).
  2. Wire to a relay and switch (fused power from battery).
  3. Route wires neatly (avoid hot/exposed areas).

Best Setup for a 1995 Hilux

  • Daily Driving: H4 LED bulbs + LED fog lights.
  • Off-Road: H4 LEDs + 20-inch light bar + rock lights.
  • Budget Option: Just upgrade to H4 LEDs for instant improvement.

Upgrade today and never drive in the dark again!

Pro Tip: Pair with a battery upgrade (AGM or lithium) if running extra lights.

Illuminate Your Adventure with Bronco Modular Bumper LED Fog Lights

Ford

Whether you’re cruising coastal roads at dawn or cutting through dense forest trails at dusk, enhanced fog lighting adds a layer of confidence and safety. For owners of the 2021–2025 Ford Bronco with a modular steel front bumper, aftermarket Bronco modular bumper LED fog light kits offer factory-integrated looks, powerful performance, and true plug-and-play integration. Three standout options on the market—by Oracle Lighting, RIGID Industries, and Rudy’s Performance Parts—deliver bright illumination, rugged durability, and sleek styling.


1. Oracle Lighting Triple LED Fog Light Kit

Oracle’s triple-fog kit brings next-level clarity with six high-output LED emitters (three per side) that deliver approximately 6,000 raw lumens of light. Featuring precision optics and advanced beam patterns, this kit eliminates glare and focuses illumination close to the road, enhancing visibility during fog, rain, or dust-laden off-road conditions.
Its aluminum housings are galvanized and powder-coated black for rust resistance, while the IP68 waterproof connectors ensure weatherproof reliability. Installation is bolt-on—no drilling or bumper modifications needed—and designed for under-30-minute installs using OEM hardware. The kit also includes a relay-switch harness and mounting brackets, making it a consummate, turnkey upgrade .


2. RIGID Triple SR‑M Fog Light Kit

Engineered in collaboration with Ford Performance Parts, the RIGID SR‑M kit includes six pods—two SAE fog lights, two drive lights, and two spot lights—offering the broadest coverage from short-range fog to long-distance spotting.
Mounting brackets are premium stainless steel with UV/abrasion-resistant powder coating, designed to integrate seamlessly with the modular bumper and resist corrosion. Each pod delivers raw lumen outputs from about 1,200 to nearly 2,400 lumens, with spot lights reaching over 10,000 cd intensity, making this kit among the brightest available.


3. Rudy’s Custom LED Fog Light Kits

Rudy’s offers lightweight aluminum fog bracket systems that bolt directly into the modular bumper using OE mounting studs. Their kits allow for dual or triple light configurations and customization of light style and color. Each bracket is powder-coated black for discreet styling and durability.
Ideal for riders who want to tailor their Bronco’s lighting setup, Rudy’s system supports toggle or plug-and-play upfitter harness options, so you can wire it into factory aux switches or your own custom wiring solution.


✅ Why Choose Modular Bumper Fog Lighting?

  1. Seamless OEM Appearance
    All these options mount flush into the steel modular bumper using factory holes and hardware—no drilling, trimming, or body modifications.
  2. Exceptional Off-Road & Street Utility
    With brightness ranging from compact fog lamps to full triple-spot arrays, these kits are purpose-built for tough terrain and changing weather, while remaining easy to wire and control.
  3. Construction Built for Adventure
    From stainless steel brackets to IP-rated lights and sealed lenses, each kit is designed to resist mud, water, and corrosion during extended field use.
  4. Hassle-Free Installation
    Oracle and RIGID kits drop into place with minimal tools; Rudy’s offers customizable bracket sets. Most installations take under an hour—even for first-time upgraders.

⭐ Real Rider Insights & Tips

Many Bronco owners report that modular-bumper factories leave wiring plug-ins behind tow-hook covers—even on trims without factory fog lights. This makes retrofitting simpler if you enable fog functionality using software tools like Forscan, or add an aux switch system. Users confirm that factory switches can be reprogrammed or adapters used to create true plug-and-play setups.

It’s common to pair SAE-certified street‑legal fog lights (for legal compliance) with spot or driving lights controlled by aux switches—a mix that balances legality with off-road performance, as highlighted by DIY installations and lighting setup recommendations.


🧳 Final Verdict

For Bronco owners fitted with 2021–2025 modular steel bumpers, adding fog lights isn’t just a cosmetic upgrade—it’s a practical safety enhancement. Whether you’re looking for ultra-bright spot beams, a clean OEM LED setup, or a customizable kit that fits your style, these modular lighting kits deliver professional-grade durability and clarity. With quick, reversible installs and robust mounts, you can light your path confidently—day or night, highway or trail.

Upgrade your Bronco’s ambience and capability with purpose-built modular bumper LED fog lights—and bring better vision to every drive.

Best 9006 LED Headlight Bulbs for Night Driving

led

When it comes to nighttime driving, visibility is everything. Whether you’re commuting after dark, navigating poorly lit roads, or driving in bad weather, your headlights play a critical role in keeping you and others safe. For drivers seeking a superior lighting solution, upgrading to 9006 LED headlight bulbs is one of the most effective and affordable improvements. With advancements in LED technology, today’s 9006 LED bulbs offer exceptional brightness, focused beam patterns, and longer lifespan — making them the top choice for confident night driving.


Why Choose 9006 LED Headlight Bulbs?

The 9006 led headlight bulb is commonly used for low beam applications in many vehicles. Traditional halogen 9006 bulbs are functional but fall short in brightness, energy efficiency, and durability. Upgrading to LED not only enhances nighttime visibility but also reduces power consumption, resists vibration, and lasts significantly longer.

Here are the primary benefits of choosing 9006 LED bulbs for night driving:

  • Increased Brightness: Most quality 9006 LED bulbs offer up to 5000–10,000 lumens per pair, delivering crystal-clear visibility at night.
  • Cool White Light (6000K): A color temperature that closely mimics daylight, reducing eye strain and helping drivers spot hazards faster.
  • Focused Beam Pattern: Engineered to reduce glare and dark spots, keeping light on the road where it’s needed most.
  • Plug-and-Play Compatibility: Easy installation with no wiring or modifications needed on most vehicles.

Top Features to Look For in the Best 9006 LED Bulbs

When shopping for the best 9006 LED headlight bulbs for night driving, look for these must-have features:

1. High Lumen Output

Choose bulbs that deliver a minimum of 6000 lumens per set. This ensures maximum visibility and improves reaction time by illuminating road signs, lane markers, and potential hazards more clearly.

2. Built-in Canbus and EMC

Canbus-ready bulbs prevent dashboard warning lights and flickering in modern vehicles. EMC (Electromagnetic Compatibility) shields the bulb from causing interference with radios and other electronics.

3. Efficient Heat Dissipation

LEDs generate heat, and managing that heat is crucial. Look for bulbs with advanced cooling systems like dual copper heat pipes and built-in high-speed fans to maintain stable performance over time.

4. Waterproof and Durable Construction

Weather resistance is essential for year-round performance. Look for IP67 or IP68 rated bulbs that are sealed against dust, rain, and road grime.

5. Precision Beam Pattern

Avoid blinding oncoming drivers. High-quality LED bulbs mimic the halogen beam shape to focus light correctly on the road, offering both safety and legal compliance.


Recommended Picks for Night Driving

While many brands claim to be the best, only a few deliver the brightness, reliability, and longevity required for serious night driving. Consider these options:

  • Ultra Bright 9006 LED Bulbs with 60W per bulb, 12,000 lumens per set
    Perfect for drivers who want maximum visibility without glare.
  • Compact Fanless 9006 LED Bulbs with Passive Cooling
    Great for vehicles with limited headlight housing space and drivers who prefer silent operation.
  • Premium 9006 LED Bulbs with Copper + Fan Cooling, Canbus Built-in
    Balanced for performance, durability, and plug-and-play installation.

Each of these options offers outstanding visibility, reduced power draw, and reliable all-weather performance—essentials for frequent night drivers.


Light up the Road

Driving at night doesn’t have to be stressful. With the right 9006 LED headlight bulbs, you can transform your nighttime driving experience. The best bulbs offer a perfect blend of brightness, beam accuracy, and durability, helping you stay alert and safe on the road. Whether you’re upgrading an older vehicle or enhancing a modern ride, high-performance 9006 LED bulbs are a smart investment.

So, ditch the dim yellow halogens and embrace the future of lighting. With premium 9006 LED headlight bulbs, every drive after dark becomes clearer, safer, and more enjoyable.

Waterproof LED Headlights for KTM Enduro Bikes

KTM

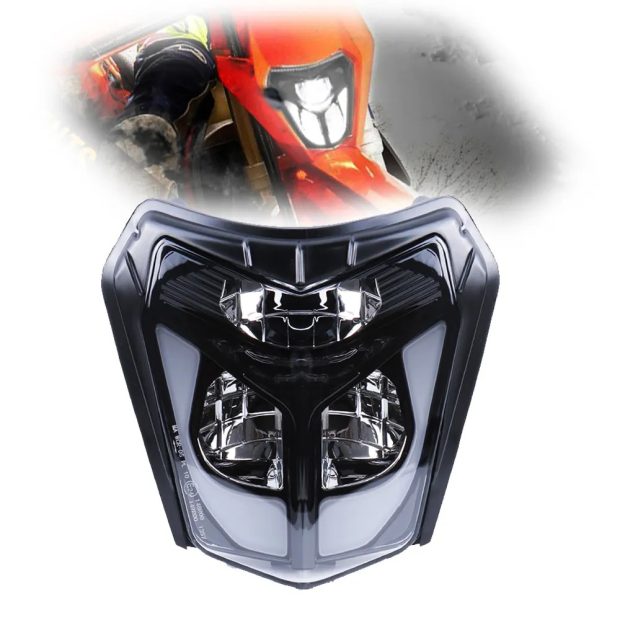
For KTM Enduro riders, reliable lighting is not just a convenience — it’s a necessity. Whether you’re navigating dense forests, rocky mountain trails, or muddy terrain at dusk, a dependable headlight ensures both visibility and safety. Standard halogen or factory lights often fall short in harsh conditions, which is why waterproof KTM LED headlights have become a favored upgrade among serious off-road enthusiasts. Designed for durability, performance, and ease of installation, these headlights are engineered specifically for the demanding environments KTM Enduro bikes frequently encounter.

Why Choose LED Headlights?

LED technology offers numerous advantages over traditional halogen or incandescent bulbs. First and foremost, LED headlights provide significantly brighter and more focused illumination. This means better visibility of the trail ahead, quicker reaction times, and improved safety during low-light or nighttime riding. LEDs also consume less power, which puts less strain on your bike’s electrical system — a key benefit when running additional equipment such as GPS units or heated grips.

Another major advantage is longevity. LED headlights last up to 20 times longer than halogen bulbs, reducing the need for frequent replacements. For Enduro riders, where reliability in remote areas is crucial, this is a valuable trait. You don’t want your lighting system to fail in the middle of a long-distance trail ride or a competitive enduro event.

Waterproofing for Real-World Conditions

KTM Enduro bikes are built to be taken into the wild — and that means water crossings, heavy rain, mud, and pressure washes are all part of the experience. That’s why waterproofing in your headlight assembly is essential. High-quality waterproof LED headlights come with an IP67 or IP68 rating, which means they are fully protected against dust and can withstand immersion in water for extended periods.

The headlight casing is typically constructed from die-cast aluminum, which not only aids in heat dissipation but also prevents corrosion. A sealed lens design ensures no moisture enters the housing, protecting the internal components from fogging, short-circuits, or light degradation over time. For riders who tackle streams or muddy terrain regularly, this level of protection gives peace of mind.

Compatibility with KTM Enduro Models

Most waterproof LED headlight kits are designed to fit KTM Enduro models including EXC, EXC-F, XCF-W, and similar variations from 2017 and up. They come in headlight mask designs that mirror the OEM shape, making them a plug-and-play upgrade. With minimal tools required, installation is straightforward and typically takes less than an hour, even for novice mechanics.

Some kits may also include optional adapters or wiring harnesses to fit earlier models or special editions. Always verify compatibility with your specific bike model and year before purchase to ensure a perfect fit.

Features to Look For

When shopping for a waterproof LED headlight for your KTM Enduro, consider the following features:

  • High Lumens Output: Look for units offering 3000–5000 lumens or more for maximum trail illumination.
  • Beam Pattern: A combination of spot and flood beam provides both distance and peripheral vision.
  • Shock Resistance: Off-road riding involves constant vibrations — make sure the light is impact-tested.
  • Color Temperature: 6000K–6500K cool white light closely mimics daylight, reducing rider fatigue.
  • Easy Wiring: Choose models with OEM-style connectors for quick plug-and-play installation.

KTM Lights

Upgrading to a waterproof LED headlight is one of the best investments a KTM Enduro rider can make. Not only does it dramatically improve nighttime visibility and trail confidence, but it also adds rugged durability that matches the KTM’s own off-road toughness. With advanced lighting technology, a sealed design, and easy installation, these headlights deliver consistent performance under the harshest conditions — letting you focus on the ride, not your equipment. Whether you’re a weekend trail explorer or a hardcore Enduro competitor, a waterproof LED headlight is a game-changing addition to your KTM’s setup.

Fog Light Upgrade Guide for 2011 Chevy Silverado

Silverado

Upgrading the fog lights on your 2011 Chevy Silverado is a smart move for improved visibility, safety, and aesthetics. Factory fog lights often come equipped with standard halogen bulbs that may not provide the brightness and clarity needed in poor weather conditions. Whether you’re dealing with heavy fog, rain, snow, or simply want a cleaner, more modern look, upgrading to LED fog lights and 2011 Chevy Silverado led headlights can transform your driving experience. This guide will walk you through the reasons to upgrade, your bulb options, and how to install them.

Why Upgrade the Fog Lights?

The factory fog lights on the 2011 Silverado can be underwhelming in terms of brightness and beam pattern. Halogen lights emit a yellowish hue, have limited range, and tend to dim over time. An LED upgrade not only improves light output and color temperature but also consumes less power and has a longer lifespan. LEDs also offer faster illumination response, which can be beneficial in unexpected low-visibility situations.

Choosing the Right Fog Lights

The 2011 Silverado uses H10 (9145) bulbs for its fog lights. When selecting an upgrade, consider the following types:

  • LED Fog Lights: These are the most popular upgrade due to their brightness, longevity, and energy efficiency. Look for models with a color temperature around 6000K (cool white) for modern aesthetics and better visibility.
  • Projector Fog Lights: Some aftermarket kits come with built-in projector lenses for more focused light distribution.
  • Complete Assembly Kits: If your fog light housings are worn or damaged, you may opt for a full assembly replacement with built-in LEDs and updated design.

Make sure any fog light you choose is DOT compliant to ensure legality for road use.

Key Features to Look For

  • Plug and Play Installation – Most quality LED kits are designed to connect directly to your OEM wiring without modifications.
  • Waterproof Rating (IP67 or higher) – Ensures performance in rain, snow, or off-road conditions.
  • Built-in Cooling System – Heat sinks or fans to maintain safe operating temperatures and extend lifespan.
  • CANbus Compatibility – Prevents dashboard error codes on newer models.

Installation Steps

Tools Needed:

  • Socket wrench
  • Screwdriver set
  • Zip ties (optional for wire management)

Steps:

  1. Disconnect the Battery: Always start by disconnecting the negative battery terminal to prevent electrical shorts.
  2. Access the Fog Lights: From underneath the front bumper, locate the fog light housings. You may need to remove splash guards or covers depending on your model.
  3. Remove Old Bulbs or Housings: Twist and remove the factory bulb from the back of the fog light housing. If replacing the full housing, unbolt the assembly and disconnect the wiring harness.
  4. Install New LEDs or Assembly: Insert the LED bulb into the housing, making sure it’s seated properly. For full assemblies, connect the new unit to the wiring harness and bolt it in place.
  5. Test the Lights: Before reassembling, reconnect the battery and test the fog lights. Ensure proper beam direction and functionality.
  6. Secure and Finalize: Reinstall any covers or splash guards, secure wires with zip ties if needed, and enjoy your upgraded lighting.

Upgrade Lighting for Silverado

Upgrading the fog lights on your 2011 Chevy Silverado is a straightforward project that can deliver major benefits in visibility and style. With the right LED kit, you’ll enjoy better performance in adverse weather and a refreshed look that complements the rugged design of your truck. Always check local regulations and ensure your upgrades meet DOT standards for legal use.

How to Choose the Right LED Headlight for Your Yamaha MT09

Yamaha mt07

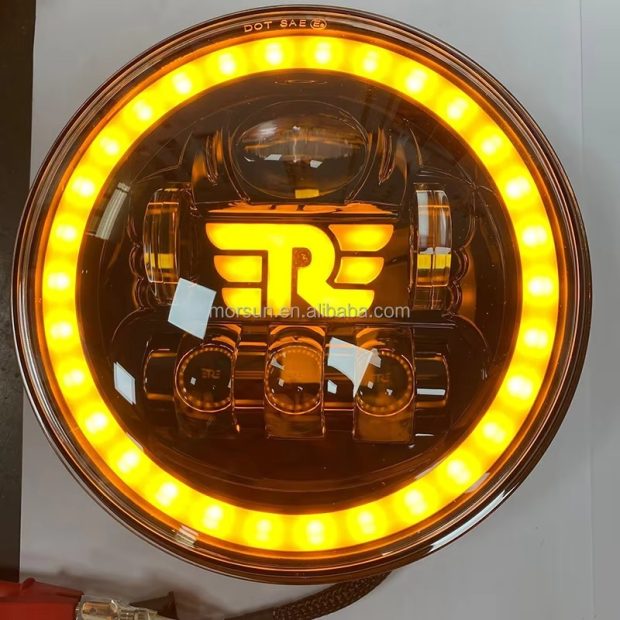
Upgrading your Yamaha MT09 with an LED headlight is one of the best ways to improve visibility, safety, and style. However, with a wide range of options on the market, finding the right Yamaha mt09 LED headlight can be overwhelming. This guide will help you identify the key factors to consider when selecting the perfect LED headlight for your MT09.


1. Ensure Compatibility with the MT09

The first step is confirming that the LED headlight is specifically designed for or compatible with the Yamaha MT09.

  • Check Mounting Size: The MT09 typically uses a 7-inch headlight. Ensure the product matches this size.
  • Plug-and-Play Design: Opt for a headlight that offers a direct fit with minimal modifications to your bike’s wiring.
  • OEM or Aftermarket Options: Choose whether you prefer an OEM-replacement style or an aftermarket design with enhanced features.

2. Prioritize Brightness and Beam Pattern

A good LED headlight offers enhanced brightness and an optimal beam pattern to ensure safety during night rides.

  • Lumen Output: Look for a headlight with at least 3,000-5,000 lumens for adequate brightness.
  • Beam Focus: Ensure the beam is evenly distributed without creating blind spots or glare for oncoming traffic.
  • Dual Beam Modes: Many LED headlights offer high and low beam modes for versatility.

3. Look for Durability and Weatherproofing

Your LED headlight must withstand varying weather conditions and the vibrations from the road.

  • Material Quality: Opt for a headlight with a durable aluminum or polycarbonate housing.
  • IP Rating: Choose a headlight with an IP67 or higher waterproof and dustproof rating for reliable performance.
  • Heat Management: Verify that the headlight includes a heat sink or cooling fan to prevent overheating.

4. Consider DOT or E-Mark Certification

Compliance with safety standards ensures the headlight is legal and safe for use.

  • DOT Approval: In the U.S., a DOT-certified headlight meets the Department of Transportation standards for road use.
  • E-Mark Certification: For international riders, E-Mark approval signifies compliance with European safety regulations.

5. Evaluate Aesthetic Features

An LED headlight can enhance your bike’s style while improving functionality.

  • Modern Design: Look for sleek, angular designs that complement the sporty aesthetics of the MT09.
  • Halo DRLs (Daytime Running Lights): Many LED headlights include integrated DRLs for added visibility and a distinctive appearance.
  • Color Temperature: A white light with a color temperature of 5,000K–6,500K mimics daylight for optimal visibility.

6. Check Energy Efficiency

LED headlights are known for their energy efficiency, but some models perform better than others.

  • Low Power Draw: Ensure the headlight minimizes strain on the bike’s electrical system.
  • Long Lifespan: Look for headlights with a lifespan of 30,000 hours or more for long-term reliability.

7. Focus on Installation Ease

A headlight that’s easy to install saves time and effort.

  • Plug-and-Play Installation: Look for a headlight with a direct plug-and-play setup requiring no additional tools or modifications.
  • Clear Instructions: Ensure the product comes with a detailed installation guide.

8. Compare Pricing and Warranty

Finding the right balance between cost and quality is crucial.

  • Set a Budget: Determine how much you’re willing to spend on a headlight upgrade.
  • Warranty Coverage: A warranty of at least one year provides peace of mind against manufacturing defects.

Yamaha MT 09 Upgrade

Choosing the right LED headlight for your Yamaha MT09 requires balancing functionality, durability, and style. By focusing on compatibility, brightness, certifications, and ease of installation, you can find an LED headlight that enhances your bike’s performance and aesthetics. Upgrade your MT09 today with a quality LED headlight, and enjoy safer and more enjoyable rides.

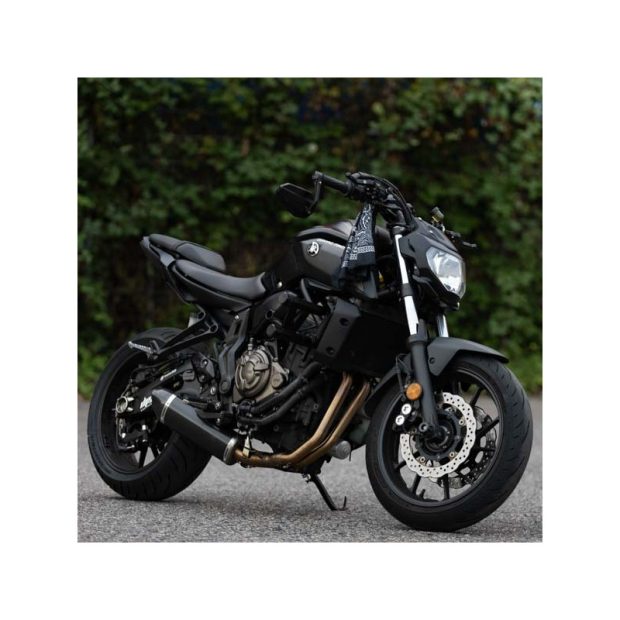
Optimizing Handling: Suspension Upgrades for the Yamaha MT-07

Yamaha mt07

The Yamaha MT-07 is celebrated for its versatility, lightweight design, and exhilarating performance. However, its stock suspension setup, while adequate for casual riding, may leave more aggressive riders seeking better handling and control. Upgrading the suspension is a game-changer, enhancing comfort just like upgrading with Yamaha MT07 led headlight, stability, and responsiveness. Here’s a comprehensive guide to optimizing your MT-07’s handling with suspension upgrades.


Why Upgrade the Suspension?

  1. Improved Stability:
    High-performance suspension components minimize chassis movement, ensuring stability during cornering, braking, and acceleration.
  2. Enhanced Comfort:
    Suspension upgrades absorb road imperfections more effectively, reducing rider fatigue on long rides.
  3. Custom Tuning:
    Aftermarket suspension allows for fine-tuning to suit your weight, riding style, and terrain, ensuring a personalized ride experience.
  4. Increased Performance:
    Whether carving through twisties or tackling track days, an upgraded suspension provides sharper handling and better feedback.

Key Suspension Upgrades for the Yamaha MT-07

  1. Fork Cartridge Kits:
    The stock front forks on the MT-07 lack adjustability, which can limit performance. Upgrading to a cartridge kit transforms the front end by offering adjustable compression, rebound damping, and spring preload. This allows you to fine-tune the suspension for precise handling and improved road feedback.
  2. Rear Shock Replacement:
    The rear shock is a critical component of the MT-07’s handling dynamics. Consider replacing the stock shock with an aftermarket unit that features adjustable compression, rebound, and preload settings. Premium options include piggyback or remote reservoir designs for better heat dissipation during spirited riding.
  3. Progressive Springs:
    Upgrading to progressive springs can enhance both the front and rear suspension. These springs offer a softer initial response for comfort and a firmer feel under load for better handling in aggressive riding scenarios.
  4. Adjustable Steering Dampers:
    Adding a steering damper helps stabilize the front end, especially at high speeds or on uneven surfaces. This upgrade reduces handlebar wobble and provides a smoother, more controlled ride.

Installation and Setup Tips

  1. Set Your Sag:
    Proper sag adjustment is essential for optimal suspension performance. Ensure the bike’s sag is set to match your weight and riding style.
  2. Match Components:
    Balance is key—ensure your front and rear suspension upgrades complement each other for cohesive handling.
  3. Seek Professional Assistance:
    Suspension upgrades often require specialized tools and expertise. Consider having the components installed and adjusted by a professional mechanic or suspension specialist.
  4. Test and Fine-Tune:
    Once installed, test your bike in various riding conditions. Adjust settings incrementally to find the perfect balance for your needs.

Best Brands for Yamaha MT-07 Suspension Upgrades

  • Ohlins: Renowned for high-quality, race-inspired suspension components.
  • K-Tech: Offers innovative and adjustable suspension solutions.
  • YSS: A cost-effective option with excellent performance features.
  • Racetech: Specializes in springs and cartridge kits tailored to rider specifications.

Upgrading the suspension on your Yamaha MT-07 is one of the most effective ways to optimize handling and elevate your riding experience. With enhanced stability, comfort, and performance, these upgrades allow you to push your MT-07 to its limits with confidence. Whether you’re tackling tight corners or cruising the open road, a well-tuned suspension transforms your bike into a handling masterpiece. Invest in quality components and feel the difference every mile!

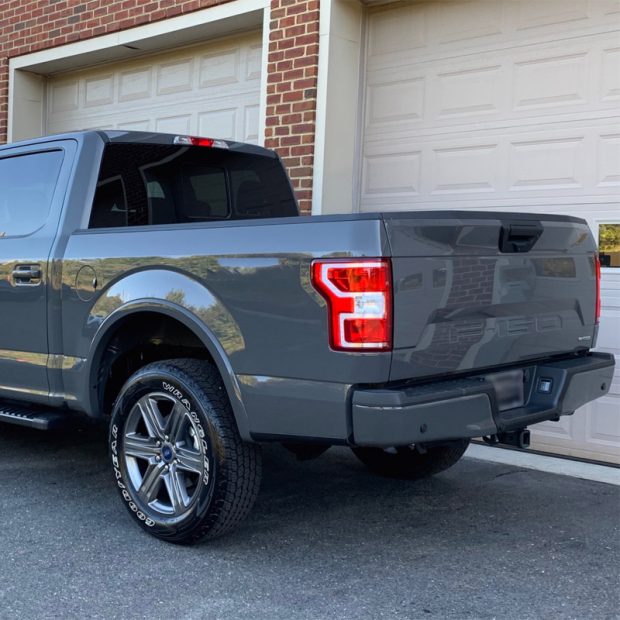
Increase the Towing Capacity of 2007 Silverado

Silverado

The 2007 Chevy Silverado 1500 is a versatile truck, but if you find yourself needing to tow heavier loads, there are several modifications and upgrades you can make to increase its towing capacity. While it’s important to stay within the manufacturer’s recommended limits, certain changes can improve the truck’s performance, handling, and safety when towing. For more safe issue like lighting, you need to upgrade with the 2007 Chevy Silverado 1500 headlights too. Below are steps you can take to safely increase the towing capacity of your 2007 Chevy Silverado 1500.

1. Upgrade the Suspension System

One of the most effective ways to improve your truck’s towing capabilities is to upgrade its suspension system. The suspension helps support the weight of the trailer and ensures smoother towing. A stock suspension may sag under heavy loads, reducing stability and control.

Upgrades to Consider:

  • Install heavy-duty leaf springs or coil springs. These can better handle the additional weight of a trailer, preventing rear-end sag.
  • Add air suspension kits. Air suspension systems allow you to adjust the stiffness of the suspension, improving handling and load distribution while towing.
  • Install helper springs. These provide additional support to your existing springs, reducing strain on the suspension when carrying heavier loads.

2. Upgrade the Braking System

When towing heavier loads, your truck’s braking system needs to be up to the task. Stopping a heavier trailer requires more braking force, and upgrading the brakes ensures better control and safety while towing.

Upgrades to Consider:

  • Install larger brake rotors and calipers. These provide more surface area and stopping power to help you safely slow down or stop the truck while towing.
  • Consider high-performance brake pads. Pads made of ceramic or metallic materials offer better heat resistance and braking performance under heavy loads.
  • Add a trailer brake controller. A brake controller syncs your truck’s brakes with the trailer’s brakes, providing smoother and more effective stopping power.

3. Install a Transmission Cooler

Towing heavy loads puts extra stress on your truck’s transmission, which can cause it to overheat. Installing a transmission cooler is one of the most effective ways to prevent overheating and extend the life of your transmission while towing.

Benefits of a Transmission Cooler:

  • Reduces transmission temperature. By keeping the transmission fluid cooler, you prevent damage caused by excessive heat and ensure smoother shifting while towing.
  • Improves towing performance. A transmission cooler helps maintain consistent transmission performance, even under the stress of towing heavy loads.

4. Upgrade the Hitch Receiver

The factory hitch receiver on a 2007 Chevy Silverado 1500 is designed for light to moderate towing. To increase your towing capacity, upgrading to a Class IV or Class V hitch receiver will allow your truck to tow heavier loads safely.

Types of Hitch Upgrades:

  • Class IV Hitch: Typically rated for up to 10,000 pounds of towing capacity, this hitch is suitable for most larger trailers, boats, and campers.
  • Class V Hitch: Designed for the heaviest towing loads, this hitch can handle up to 20,000 pounds, depending on the model. It’s ideal for those who frequently tow large trailers or machinery.

5. Upgrade the Rear Axle Ratio

The axle ratio plays a critical role in towing capacity. Trucks with a lower axle ratio (numerically higher) have better torque and pulling power, making them better suited for towing heavy loads.

Axle Ratio Upgrade:

  • Switch to a 4.10 or 4.56 axle ratio. A higher axle ratio increases the torque available to tow heavier trailers. However, be aware that this may reduce fuel efficiency when not towing.

6. Upgrade the Tires

Tires play a crucial role in towing safety and stability. The standard tires on a 2007 Chevy Silverado 1500 may not be sufficient for towing heavier loads. Installing the right set of tires will improve traction, handling, and load-bearing capacity.

Tire Upgrades to Consider:

  • Use load-rated tires. Look for tires with a higher load rating (e.g., Load Range E) designed to carry the weight of your truck and trailer safely.
  • Choose all-terrain or towing-specific tires. These types of tires provide better stability, grip, and control, especially when towing on rough roads or off-road conditions.

7. Install an Engine Tuner or Programmer

An engine tuner or programmer can adjust your truck’s engine performance to improve torque and horsepower, which are essential for towing heavy loads. These devices allow you to modify the engine’s parameters to maximize towing power and fuel efficiency.

Benefits of an Engine Tuner:

  • Increases torque and horsepower. This extra power helps the truck pull heavier trailers more easily.
  • Improves throttle response. Better throttle response ensures quicker acceleration when merging onto highways or climbing steep inclines with a trailer.
  • Optimizes fuel efficiency. Some tuners can adjust the fuel map to maintain better fuel efficiency while towing.

8. Install a Heavy-Duty Tow Package

Many aftermarket companies offer heavy-duty tow packages that include a combination of upgrades such as reinforced suspension, upgraded cooling systems, and enhanced hitch systems. Installing a tow package tailored to your needs can ensure your truck is ready for heavy-duty towing.

Tow Package Components:

  • Upgraded hitch receiver.
  • Transmission cooler.
  • Brake upgrades.
  • Heavy-duty rear axle.
  • Reinforced suspension.

9. Routine Maintenance and Inspections

Finally, ensuring your truck is in top condition is essential for safe towing. Performing routine maintenance on your 2007 Chevy Silverado 1500 will help prevent breakdowns and ensure all components are working effectively when towing.

Maintenance Tips:

  • Check fluid levels regularly. Transmission fluid, engine oil, and coolant are especially important when towing, as they prevent overheating and protect key components.
  • Inspect the brakes, suspension, and tires before towing. Make sure everything is in good condition to handle the extra weight.
  • Follow recommended service intervals for engine tune-ups, fluid changes, and filter replacements to ensure your truck is always performing at its best.

Increase the Towing Capacity

Increasing the towing capacity of your 2007 Chevy Silverado 1500 requires a combination of mechanical upgrades and regular maintenance. By upgrading the suspension, brakes, hitch receiver, and axle ratio, along with installing a transmission cooler and engine tuner, you can safely tow heavier loads while maintaining control and stability. Always ensure that your truck is properly equipped and maintained to handle the increased demands of towing, and avoid exceeding the manufacturer’s recommended towing limits.